How to Cancel iMaps+
Published by Apptility LimitedWe have made it super easy to cancel iMaps+ for Google Maps subscription
at the root to avoid any and all mediums "Apptility Limited" (the developer) uses to bill you.
Complete Guide to Canceling iMaps+ for Google Maps
A few things to note and do before cancelling:
- The developer of iMaps+ is Apptility Limited and all inquiries must go to them.
- Check the Terms of Services and/or Privacy policy of Apptility Limited to know if they support self-serve subscription cancellation:
- Cancelling a subscription during a free trial may result in losing a free trial account.
- You must always cancel a subscription at least 24 hours before the trial period ends.
Pricing Plans
**Gotten from publicly available data and the appstores.
iMaps+ operates as a subscription service. Recurring purchase is required for full functionality. Payment will be charged to your iTunes Account at confirmation of purchase. Subscriptions automatically renew unless auto-renew is turned off at least 24-hours before the end of the current period. Your account will be charged for renewal within 24-hours prior to the end of the current period. Subscriptions may be managed, and auto-renewal may be turned off, from iMaps+ settings or the Apple Settings app. Any unused portion of a free trial period, if offered, will be forfeited if you change your subscription term.

How to Cancel iMaps+ for Google Maps Subscription on iPhone or iPad:
- Open Settings » ~Your name~ » and click "Subscriptions".
- Click the iMaps+ (subscription) you want to review.
- Click Cancel.
How to Cancel iMaps+ for Google Maps Subscription on Android Device:
- Open your Google Play Store app.
- Click on Menu » "Subscriptions".
- Tap on iMaps+ for Google Maps (subscription you wish to cancel)
- Click "Cancel Subscription".
How do I remove my Card from iMaps+?
Removing card details from iMaps+ if you subscribed directly is very tricky. Very few websites allow you to remove your card details. So you will have to make do with some few tricks before and after subscribing on websites in the future.
Before Signing up or Subscribing:
- Create an account on Justuseapp. signup here →
- Create upto 4 Virtual Debit Cards - this will act as a VPN for you bank account and prevent apps like iMaps+ from billing you to eternity.
- Fund your Justuseapp Cards using your real card.
- Signup on iMaps+ for Google Maps or any other website using your Justuseapp card.
- Cancel the iMaps+ subscription directly from your Justuseapp dashboard.
- To learn more how this all works, Visit here →.
How to Cancel iMaps+ for Google Maps Subscription on a Mac computer:
- Goto your Mac AppStore, Click ~Your name~ (bottom sidebar).
- Click "View Information" and sign in if asked to.
- Scroll down on the next page shown to you until you see the "Subscriptions" tab then click on "Manage".
- Click "Edit" beside the iMaps+ for Google Maps app and then click on "Cancel Subscription".
What to do if you Subscribed directly on iMaps+'s Website:
- Reach out to Apptility Limited here »»
- If the company has an app they developed in the Appstore, you can try contacting Apptility Limited (the app developer) for help through the details of the app.
How to Cancel iMaps+ for Google Maps Subscription on Paypal:
To cancel your iMaps+ subscription on PayPal, do the following:
- Login to www.paypal.com .
- Click "Settings" » "Payments".
- Next, click on "Manage Automatic Payments" in the Automatic Payments dashboard.
- You'll see a list of merchants you've subscribed to. Click on "iMaps+ for Google Maps" or "Apptility Limited" to cancel.
How to delete iMaps+ account:
- Reach out directly to iMaps+ via Justuseapp. Get all Contact details →
- Send an email to [email protected] Click to email requesting that they delete your account.
Delete iMaps+ for Google Maps from iPhone:
- On your homescreen, Tap and hold iMaps+ for Google Maps until it starts shaking.
- Once it starts to shake, you'll see an X Mark at the top of the app icon.
- Click on that X to delete the iMaps+ for Google Maps app.
Delete iMaps+ for Google Maps from Android:
- Open your GooglePlay app and goto the menu.
- Click "My Apps and Games" » then "Installed".
- Choose iMaps+ for Google Maps, » then click "Uninstall".
Have a Problem with iMaps+ for Google Maps? Report Issue
Leave a comment:
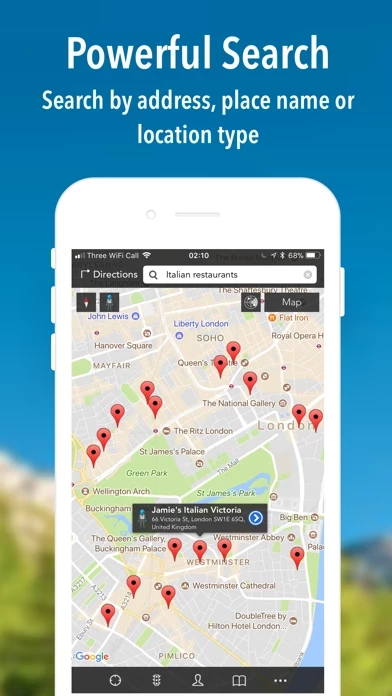
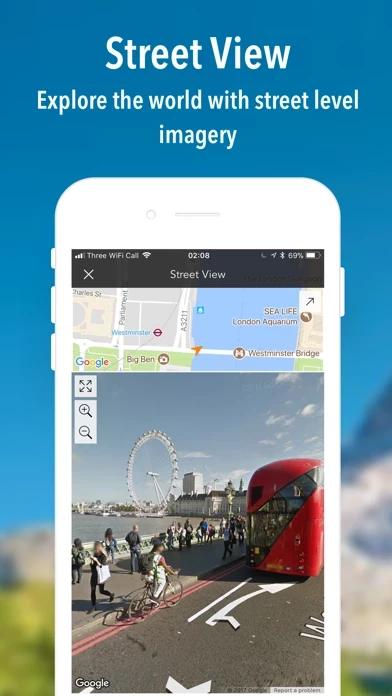
What is iMaps+ for Google Maps?
iMaps+ brings Google maps, directions and street view to your iOS device. Features: - Search by address or textual query (eg 'London, UK' or 'Restaurants in New York'). In addition, you can 'radar search' the visible map area to locate places of interest such as restaurants, pubs, ATMs and more. - Just tap on any of the places of interest on the map for more details, or to access street view. - Street view can also be accessed from a dropped pin, search result or bookmarked location. Alternatively, drag the peg-man from the top left of the screen as on Google Maps on a desktop. - Book hotels via our partnerships with Booking.com, Hotels.com and Agoda.com - Map details are cached once viewed, browse them again even when you don't have an internet connection - perfect for travelling! - Get step by step driving, cycling, walking and public transport directions. Choose to avoid highways or tolls and select from a number of alternative routes. For public transport, you also have the option of setting an arrival/departure time. - Set up notifications to fire when you arrive at a specific location. - Record journeys such as a hike, bike ride or road trip, even while the app is in the background. Recorded routes are saved and can be recalled at any time. (IAP) - Swipe up and down with two fingers to tilt the map and access 3D views in main cities around the world. - Map overlays including live traffic, public transport lines and indoor maps. - Use addresses from your iPhone contact...